Key Takeaways:
- You can’t run a Nest Doorbell through a USB as it can’t deliver sufficient power for the doorbell.
- A Chime alerts you indoors when someone is at the door.
- You can change chime sounds via the Nest app, by selecting from various present tones.
- A red line on Nest Doorbell indicates a power problem, so, check its wiring or upgrade the transformer.
Wondering how to get the most out of your Nest Hello Doorbell? Whether it’s setting up, customizing chimes, or solving power issues, this article is your go-to guide. I’ll walk you through everything from the basics of using the USB port for updates and troubleshooting to personalizing your doorbell’s chime sounds and more!
1. Can the Nest Hello Doorbell be permanently run through the USB port?
You can’t permanently run the Nest Hello doorbell through a USB port. The Nest Hello requires a consistent power supply, typically provided by your doorbell’s existing wiring, which delivers 16-24V AC. USB ports generally supply 5V DC, which isn’t sufficient for the Nest Hello’s operation. However, there’s a workaround if you lack the necessary wiring.
Here’s how you can set up the Nest Hello using an indoor power adapter:
- Purchase an appropriate power adapter: Get a power adapter that outputs 16-24V AC, specifically designed for smart doorbells like the Nest Hello.
- Prepare the adapter: Make sure the adapter’s wires are stripped and ready for connection.
- Disconnect your current doorbell wiring: If you have an existing doorbell, safely disconnect the wires.
- Connect the adapter to the Nest Hello: Attach the adapter wires to the Nest Hello’s terminals. Match the polarity as indicated in the Nest Hello’s installation guide.
- Mount the Nest Hello: Securely mount the doorbell at your desired location.
- Plug in the adapter: Connect the adapter to a power outlet inside your home. Ensure it’s a safe, dry location.
By following these steps, you can effectively power your Nest Hello without traditional doorbell wiring, but remember, using a USB port directly isn’t an option due to voltage incompatibility.
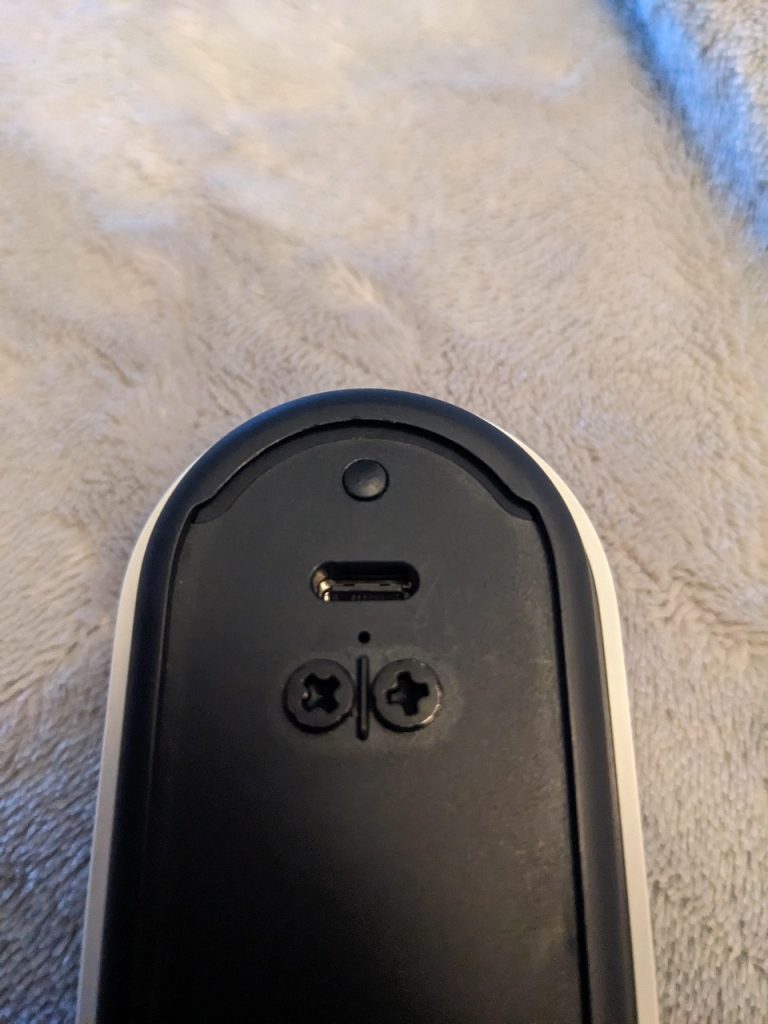
2. How do I use the Nest doorbell USB port?
To use the USB port, follow these simple steps:
- Make sure you have the right USB cable that fits your Nest Hello Doorbell. This is usually a micro-USB or USB-C cable, similar to what many smartphones use.

- Plug one end of the USB cable into the Nest Doorbell and the other end into your computer.
- Once connected, you can perform several tasks. Decide what you need to do:
- For Charging: If your doorbell charges via USB, it will start charging once connected.
- For Updates: Follow on-screen instructions on your computer to update the doorbell’s software.
- For Troubleshooting: Use the computer to run diagnostics if there are any issues with your doorbell.
3. Do I need a Chime for Nest Hello?
No, you don’t necessarily need a traditional chime for the Nest Hello doorbell, but it depends on your preferences and setup.
So, while you don’t necessarily need a chime for the Nest Hello, it enhances the experience. If you have an existing wired doorbell chime, you can connect the Nest Hello to it. This way, you’ll hear a traditional chime sound inside your home when someone presses the doorbell.
However, if you don’t have a wired chime or prefer a different solution, there are alternatives:
- Use a Google Nest Hub or speakers: You can configure these devices to play a sound when someone rings the doorbell. This setup integrates seamlessly with your Nest Hello.
- Get a wireless chime: Some third-party wireless chimes are compatible with the Nest Hello. Check compatibility before purchasing.
- Rely on mobile notifications: The Nest app can send alerts to your smartphone whenever the doorbell is pressed.

4. How does the Nest Doorbell Chime work, and can it be customized?
The Nest Doorbell Chime works by connecting to your existing wired chime or using compatible Google Nest devices for notifications. It can be customized through the Nest app, allowing you to choose different chime sounds and adjust settings.
You can connect the doorbell and the chime wirelessly or use existing wiring in your home to connect to your traditional chime system.
To change the chime sound on your Nest Doorbell:
- Open the Nest app on your device.
- Tap your Nest Doorbell in the app’s home screen.

- Hit the gear icon for settings, then choose Chime Settings.

- Browse the chime sounds, listen to previews, and pick your favorite.

- Tap to select your new chime sound. Confirm if asked.
- Ring your Nest Doorbell to hear the new sound in action.
5. What Does the Nest Chime Connector Do, and How Do I Install It?
The Nest Chime Connector makes Nest Hello work with your existing chime by regulating power. Here’s more in detail:
🔗 Acts as a Bridge: The Nest Hello Chime Connector links your Nest Hello to the chime you already have in your house. It makes sure that when someone presses your doorbell, the chime inside your home rings just like it should.
🔌 Solves Power Issues: Sometimes, smart doorbells like Nest Hello need a bit more power than what your old doorbell system provides. The Chime Connector helps manage this by ensuring your Nest Hello gets the right amount of power without overloading your existing chime.
Here’s how to set it up, step by step:
- Find the chime box inside your house, and switch off the power to your doorbell and chime at the main electrical panel for safety.
- Use a screwdriver to open the chime box and access the wires.
- Connect the two wires from the Nest Chime Connector to the terminals in the chime box. Use the Nest app for model-specific instructions.
- Run the doorbell wires to your Nest Hello location and attach them.
- Follow the step-by-step installation guide in the Nest app.
- Turn the electricity back on at the main panel.
- Press your Nest Hello to check if the chime rings correctly.
6. What are the features of the Google Nest Doorbell Chime VS traditional chimes?
The Google Nest Doorbell Chime lets you customize sounds, it integrates with smart home devices, and gives you mobile notifications through the Nest app. Unlike traditional chimes, it can also work with Google Nest Speakers and Displays for better alert system and smart features.
Here’s what sets Google Nest Doorbell apart:
🎵 Variety of Tunes: Unlike traditional chimes that often have one or two sounds, the Google Nest Doorbell lets you choose from a wide range of chime sounds. You can pick different tunes for the doorbell ring, including seasonal themes and fun sounds.
📲 Phone Alerts: One of the biggest differences is that the Google Nest Doorbell sends notifications straight to your phone. So, even if you’re not at home, you’ll know when someone’s at your door.
👀 See Who’s There: With the Google Nest Doorbell, you don’t just hear when someone’s at the door; you can see them too. The doorbell’s camera shows you who’s ringing the bell right on your phone.
🔇 Mute Option: If you need some quiet time, you can mute the chime directly from the Nest app. Traditional chimes don’t offer an easy mute function without physically disabling the chime.
🔗 Works with Other Devices: The Google Nest Doorbell chime can work together with other smart devices in your home. For example, if you have a smart display, it can show you who’s at the door when the doorbell rings.
🔄 Change Anytime: You can switch your doorbell’s chime sound anytime through the Nest app, offering flexibility that traditional chimes lack.
7. What does the Nest Doorbell Red Line mean?
The Nest Doorbell’s red line means there is a power or connectivity problem. It means that the doorbell is not receiving sufficient power or is facing some installation error. This could be because the power source, like your home’s doorbell transformer, isn’t strong enough.

How to get rid of the red line on Nest Doorbell?
- Check the Wiring: Sometimes, loose or damaged wires can cause power issues. Make sure all the connections to your Nest Doorbell are secure and in good shape.
- Look at the Transformer: Your doorbell runs on power from a transformer. If this transformer doesn’t provide enough voltage, your doorbell won’t work right. You should replace it with one that has a higher voltage suitable for your Nest Doorbell.
Wrapping Up Nest Hello Doorbell
So, this was all about the commonly asked Nest Hello Doorbell questions. If I left something, ask me below in the comments. For more helpful guides on Nest devices, check out the posts below:
- Does Nest work with VMS like BlueIris, iSpy, and ZoneMinder?
- All You Need to Know About Ring & Nest PoE Camera
- Top Nest and Ring Camera 5GHz Models – Expert Reviews
- Can You Use Google Nest Doorbell Without Subscription?
Hashir
Hi, I’m Hashir, a tech enthusiast with a deep love for smart home innovations. My interest in technology has always been driven by the idea of making everyday life more streamlined and efficient. After years of experimenting with smart devices in my own home, I’ve made it my mission to share what I’ve learned with others. I focus on practical, easy-to-understand solutions that anyone can implement to enhance their home. Writing for JustSmarter allows me to connect with fellow tech lovers and help them take their first steps—or next steps—into the exciting world of smart homes.