Key Takeaways:
- To install the Ring Floodlight Cam bulb:
- Turn off the power.
- Remove the old bulb.
- Installing a new one with caution.
- Replacing a Ring Floodlight Cam bulb may void the device’s warranty.
Noticed your Ring Floodlight Cam’s light getting dim or starting to flicker and wondering if you could just change the bulb yourself? This is something many people think about. In this guide, you’ll find everything you need to know about Ring Floodlight bulb replacement. Like whether you can change the bulb in your Ring Floodlight Cam, what it means for your warranty, and how to do it if you decide to go ahead.
Can You Replace Ring Floodlight Bulb?
Yes, technically, it’s possible to replace Ring Floodlight Cam bulbs, but it’s important to note that doing so can void the warranty. It’s designed with integrated LEDs, typically requiring professional repair or unit replacement.
Ring Floodlight Cam is designed with integrated LED lights, and Ring does not intend for users to replace these bulbs themselves. If you choose to replace the Ring floodlight bulb on your own, be aware that this could invalidate the warranty provided by Ring.
This means if any issues arise with the device afterward, they may not be covered under warranty. It’s generally recommended to seek professional repair or consider a full unit replacement if the lights fail to maintain the warranty and ensure proper functioning.
How to Replace Ring Floodlight Bulb?
To replace a Ring Floodlight bulb, first, ensure the power is off. Unscrew the bulb from the socket, then screw in a new compatible bulb. Finally, restore power and test the light. Some models may have integrated LEDs that require professional replacement.

Ring Floodlight bulb replacement can seem daunting, but it’s manageable with the right tools and steps. This guide simplifies the process, ensuring safe and effective replacement while reminding you that self-replacement may void the warranty.
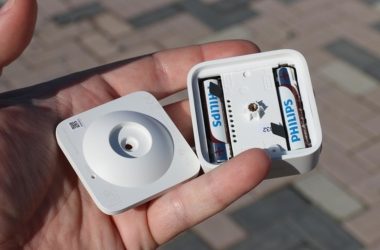
Gather Your Tools: You’ll need a Phillips head screwdriver, the correct replacement bulb (ensure it matches your Ring model), and safety gloves.
- Put on your safety gloves to protect your hands during the process.
- Go to your home’s circuit breaker and turn off the power to the area where your Ring Floodlight Cam is installed.
- Confirm that the power is indeed off. This step is crucial to avoid any electrical hazards.
- Find the part where Ring floodlight replacement bulbs are housed. It should be easily identifiable.
- Use your screwdriver to open the bulb compartment gently. Be careful to avoid using excessive force, which could damage the camera.
- Carefully twist and pull out the old bulb. Handle it gently to prevent it from breaking.
- Take the new Ring Flood Light replacement bulb, align the bulb with the socket and gently twist it into place. Make sure it’s secure, but avoid over-tightening.
- Once the new bulb is in place, reattach any covers or parts you removed. Ensure everything is properly secured.
- Restore power from the circuit breaker and test the new bulb by activating the Ring Floodlight Cam. Check if it lights up and functions correctly.
- Remember, replacing the bulb on your own may void the warranty of your Ring Floodlight Cam. If you encounter issues, contacting Ring support is advisable.
- If you’re not confident in performing any of these steps, it’s safer to hire a professional. This ensures both your safety and the integrity of your device.
When to Replace Your Ring Floodlight Cam Bulb?
Replace your Ring Floodlight Cam bulb if you notice dimming, flickering, or no light at all. Timely bulb replacement ensures clear visibility and effective security camera performance.
It’s important to recognize the signs that indicate your Ring Floodlight Cam bulb needs replacing. Timely bulb replacement ensures your security camera continues to function effectively. Here’s a simple guide to help you identify these signs and understand their impact on your camera’s performance.

Common Signs of Bulb Failure
💡 Dimming Lights: If your Ring Floodlight Cam’s lights seem less bright or have a noticeable decrease in intensity, it’s a sign they’re wearing out. Good lighting is crucial for clear visibility, especially at night.
🔦 Flickering: Flickering lights can be a symptom of bulb instability. It’s not just annoying; it can also affect the camera’s ability to record consistently clear footage.
🚫 No Light: The most straightforward sign is when the lights don’t turn on at all. This indicates a complete bulb failure and requires immediate attention.
Maintenance Tips For Ring Floodlight Light Bulb
To maintain your Ring Floodlight light bulb, keep it securely fitted and clean, avoid touching bulbs with bare hands, and regularly check for updates in the Ring app. Consider using LED bulbs for longer life and energy efficiency.
Keeping your Ring Floodlight Cam bulbs in good shape is easier than you might think. Here are some straightforward tips to help prolong their life and ensure your camera performs at its best.

- Keep it Clean: Regularly clean the bulbs and the camera lens. Dust and dirt can make the bulbs work harder, which shortens their life.
- Avoid Frequent On/Off Cycles: Turning the lights on and off too often can wear out the bulbs faster. Try to keep this to a minimum.
- Check the Connections: Make sure the bulbs are properly fitted and the connections are secure. Loose bulbs can lead to issues.
- Inspect Regularly: Look for any signs of damage or wear. Catching problems early can save the bulb and improve camera performance.
- Update Regularly: Keep your Ring Floodlight Cam’s software up to date. Updates can fix bugs and improve the overall efficiency of the device, including the bulbs.
- Use Technical Support: If you notice any issues, don’t hesitate to contact Ring’s technical support. They can help troubleshoot problems and prevent further damage to the bulbs.
Is It Cheaper to Replace Bulb Or Buy A New Ring Floodlight Cam?
Replacing a bulb in a Ring Floodlight Cam is cheaper, costing between $5 to $15, while buying a new device ranges from $200 to $250. The choice depends on your need for newer features versus the cost savings of bulb replacement.
Deciding whether to replace bulbs in your Ring Floodlight Cam or buy a new one involves understanding the costs involved. Let’s break down these expenses and explore long-term financial implications to help you make a budget-friendly decision.

💰 Cost Comparison: Ring Bulb Replacement vs. New Purchase
Replacing Bulbs: Buying new bulbs costs about $5 to $15. You might also need tools or someone’s help to put them in, but it’s still way cheaper than getting a new camera.
Buying a New Camera: Getting a new Ring Floodlight Cam will cost you around $200 to $250. It’s more money upfront, but you get all the newest features and a fresh warranty.
📅 Long-Term Costs: Maintenance vs. Replacement
Regular Maintenance: Regularly replacing bulbs and maintaining your camera can add up over time. You have to consider the cost of bulbs and any other parts that might need fixing.
Buying New: While more costly at first, a new camera might not need any repairs for a while. Plus, newer models might be more energy-efficient, saving you money on electricity.
Is Ring Floodlight Light Replacement a Good Idea?
If your Ring Floodlight Cam is past its warranty, then it is okay to give bulb replacement a shot. Also, I think it is best to hire a professional to change the bulb rather than doing it yourself. But if your floodlight is very old, it’s better to just get a new one altogether. Here’s what to keep in mind when replacing Ring Floodlight Cam bulb:
- You can choose any of these Floodlight mounting options.
- Before changing the Floodlight cam, make sure to check if there is water damage and how to resolve it.
- You can choose between Ring Floodlight Pro or Plus, which are two great options.