
Key Takeaways
- You can get a Ring Motion Sensor tampered alert due to:
- Improperly Closed Case
- Physical Disturbance
- Faulty Tamper Button
- Environmental Factors
- To fix Ring Motion Sensor tampered alert:
- Disarm the sensor before troubleshooting to avoid triggering alarms.
- Inspect for loose covers, dust, or damage.
- Secure the cover firmly, ensuring proper alignment.
- Reboot the sensor by removing and reinserting the battery.
- Update firmware and recalibrate the sensor via the Ring app.
- Manually clear the tampered alert in the Ring app.
- If issues persist, perform a factory reset on the sensor.
Is your Ring Motion Sensor tampered but you can’t figure out what’s wrong? I’ve dealt with this problem and created this guide to help you understand why false tampered alerts occur and how to fix them.
What Does Tampered Mean on Ring Motion Sensor?

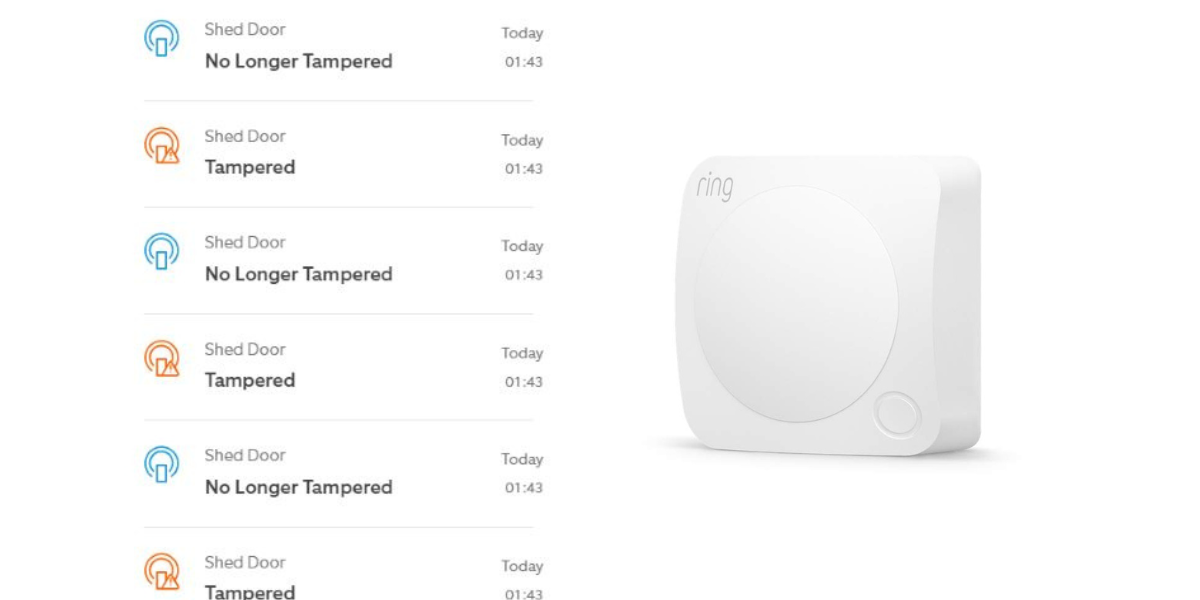
On a Ring Motion Sensor, “tampered” means the device has been physically disturbed, such as being moved, removed from its mount, or the cover being opened. This alert notifies you of potential interference, keeping you aware of actions that could affect your home security.
What to Do Immediately If You Detect Tampering
Here are the immediate actions to take when tampering is detected on your Ring Motion Sensor:
- 🔍 Inspect the Sensor: Check if the sensor is moved, dislodged, or damaged.
- 📍 Reposition or Secure the Sensor: Place it back correctly and ensure it’s firmly secured to prevent further tampering.
- 🔋 Check the Battery and Cover: Make sure the battery is properly seated, and the cover is securely closed.
- 🎥 Review Security Footage: Check nearby cameras for suspicious activity around the sensor.
How to Remove Tampered From Ring Motion Sensor
To remove the “Tampered” status from your Ring Motion Sensor, you can follow the steps below. But before anything else you should disarm your sensor.
1. Disarm the Sensor Before Troubleshooting
It’s a good practice to disarm the sensor before troubleshooting to avoid triggering alarms or unexpected notifications. Disarming the sensor ensures that any changes you make, like opening the cover or removing the battery, won’t activate the security system or send alerts to your phone.
Here’s how to do it:
- Open the Ring App on your smartphone or tablet.
- Go to the Dashboard and tap the shield icon to access the security settings.
- Select the Disarmed mode to ensure all sensors, including the motion sensor, are inactive during your troubleshooting.
Once you’ve finished troubleshooting, you can rearm the sensor by setting the system back to Home or Away mode, depending on your preference.
2. Check the Sensor
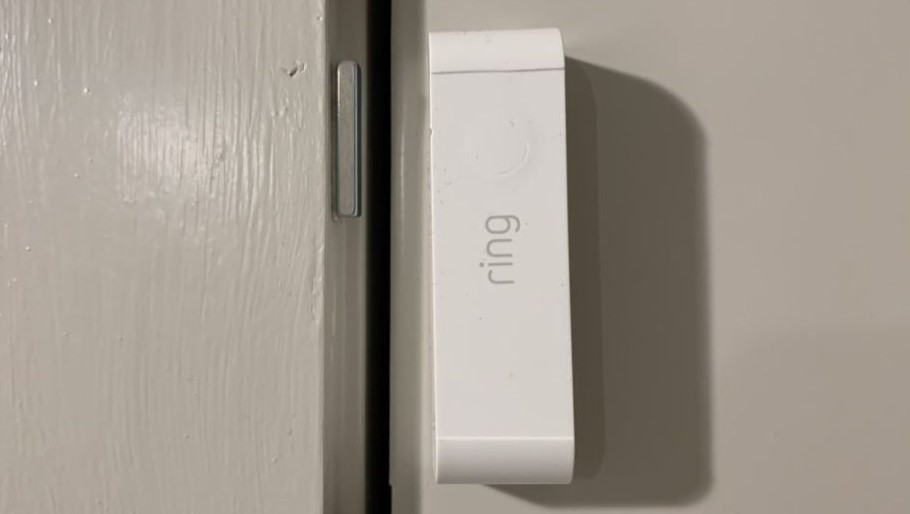
Now, start by closely inspecting the Ring Motion Sensor to ensure the cover is securely attached. The “Tampered” alert is frequently triggered when the cover is loose, misaligned, or not properly attached.
Here’s how to thoroughly check the sensor:
- Visually Check the Cover: Look for gaps between the cover and sensor body that could trigger a tamper alert.
- Check for Dust or Debris: Clean the cover edges with a soft cloth to remove dust or debris that may prevent proper closure.
- Examine the Mounting Position: Ensure the sensor is securely mounted; improper positioning or vibrations can trigger tamper alerts.
- Check Internal Clips: Open the cover and check clips for damage or obstructions that could prevent it from staying shut.
3. Secure the Sensor Cover
After inspecting the sensor, secure the cover tightly to resolve the tamper alert:
- Press the Cover Firmly: Press around the cover until you hear a click, indicating it’s securely in place.
- Ensure Proper Alignment: Align the cover with the sensor body before pressing down to avoid misalignment.
- Inspect Internal Clips: Check for damage if the cover doesn’t stay closed, and replace clips if needed.
- Test Stability: Wiggle the cover to ensure it’s secure; repeat if there’s any movement.
4. Reboot the Motion Sensor
Rebooting the motion sensor can help reset its status and clear the tampered alert. This quick reset often resolves minor glitches affecting the sensor’s performance.
Here’s how to properly reboot your Ring Motion Sensor:
- Open the sensor’s cover carefully to access the battery compartment. Depending on the model, you may need to press a release tab or gently pry open the cover.
- After removing the battery, wait for about 10 seconds to let the sensor to power down fully.
- Reinsert the battery, ensuring the positive and negative ends are correctly aligned.
- Close the sensor’s cover securely until it clicks into place.
- Open the Ring app and check the sensor’s status. The tampered alert should clear within a few moments after the reboot.

5. Update Firmware
Updating the firmware can sometimes resolve false tamper alerts. Here’s how to check for firmware updates in the Ring app:
- Open the Ring app on your smartphone.
- Select your Ring Chime from the list.
- Go to Device Health.
- Tap Firmware. If it’s outdated, a version number will appear and Ring will update automatically.
- If it is already updated, you’ll see Up to Date instead of version number.

6. Recalibrate the Sensor
Recalibrating the sensor through the Ring app helps reset its status and can address issues like false tamper alerts. Here’s how to recalibrate your motion sensor:
- Open the Ring app.
- Go to Devices > Motion Sensor.
- Select Device Settings > Advanced Options > Recalibrate.
7. Clear Tamper Alert in the App
After securing the sensor cover and updating the firmware, you might still see the tamper alert in the Ring app. Clearing this alert manually helps ensure your sensor is functioning normally.
Here’s how to do it:
- Open the Ring app.
- Go to Devices > Motion Sensor.
- Tap Clear Tamper Alert if this option appears.
8. Factory Reset the Sensor
If all else fails, you’ll need to perform a factory reset. This will return the sensor to its original settings, which can help eliminate stubborn tampered alerts.
To reset the sensor, follow these steps:
- Remove the sensor from the Ring app.
- Press and hold the reset button on the sensor.
- While holding the button, reinsert the batteries.
- Release the reset button after a few seconds to complete the reset process.
How to Prevent False Ring Motion Sensor Tampered Alert
Here’s how to deal with a seemingly false Ring Motion Sensor tampered alert:
- Shut the Sensor Case Properly: A common cause of tamper alerts is when the sensor case isn’t fully closed. Ensure it clicks firmly into place to prevent these alerts.
- Faulty Tamper Button or Sensor Malfunction: A faulty tamper button or sensor malfunction can trigger false alerts. If the button is stuck or too sensitive, try resetting or replacing the sensor.
- Environmental Factors Affecting the Sensor: Heat, humidity, or vibrations can cause the sensor to shift and trigger alerts. Place sensors in stable environments to avoid this.
- Installation Errors: Improper installation can cause Ring Motion Sensor tampered alerts. Ensure the sensor is mounted flush and securely in place.
No More False Ring Motion Sensor Tampered Alerts
Basic checks and adjustments can resolve false Ring Motion Sensor tampered alerts. Proper installation and regular maintenance can also help prevent these issues.
For more on Ring security devices, explore these posts:
- To fix an offline Ring Sensor, use range extenders, replace the sensor if necessary, and regularly update the Ring app and firmware.
- If your Ring video freezes, check Wi-Fi, restart devices, update firmware, adjust video settings, and reinstall the Ring app.
- To stop your Ring Camera clicking noise, add lighting, secure the mount, disable night vision, and power cycle the device.
Frequently Asked Questions
Why is my Ring sensor tampered (2nd Generation)?
How to perform a Ring door sensor tamper reset?
1. Disarm the sensor in the Ring app to prevent alarms.
2. Open the sensor cover and remove the battery.
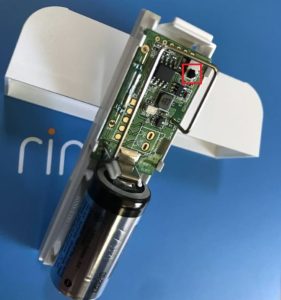
3. Locate the tamper button near the antenna.
4. Press and hold the tamper button.
5. Reinsert the battery while continuing to hold the tamper button.
6. Wait for the LED light to flash, then release the tamper button.
7. This resets the sensor and clears the tamper alert.
Where is the Ring sensor tamper button?
Hashir
Hi, I’m Hashir, a tech enthusiast with a deep love for smart home innovations. My interest in technology has always been driven by the idea of making everyday life more streamlined and efficient. After years of experimenting with smart devices in my own home, I’ve made it my mission to share what I’ve learned with others. I focus on practical, easy-to-understand solutions that anyone can implement to enhance their home. Writing for JustSmarter allows me to connect with fellow tech lovers and help them take their first steps—or next steps—into the exciting world of smart homes.